Showing posts with label gluten free. Show all posts

Tuesday, September 26, 2017

Instant Pot Cioppino


When the weather starts to cool, I crave warming foods, soups and stews are always a go to. With the help of an Instant Pot, this super flavorful Cioppino comes together in about an hour. I used some of my pre-packaged SizzleFish scallops, wild gulf shrimp, and sable fish, which made it super easy. If any of you are looking to supplement more seafood into your diet, I cannot recommend SizzleFish enough! Everything comes pre-packaged single serving. So you're not having to defrost a ton of seafood at one time. Anyway, feel free to substitute or omit whatever seafood you prefer. I also added some clams and crab legs for that extra "umph." 

What you'll need:

For the soup base:
  • 3 tbsp grassfed butter (i.e. Kerrygold unsalted)
  • 3 tbsp olive oil
  • 1 small onion, small diced
  • 2 medium carrots, small diced
  • 2-3 celery stalks, small diced
  • 1/2 green bell pepper, small diced
  • 1 small fennel bulb, small diced
  • 5-6 large garlic cloves, minced
  • 2 14oz cans of crushed tomatoes
  • 2 8oz bottles of clam juice
  • 2 tbsp tomato paste
  • 2 tsp Worchestershire (I used a glutenfree brand)
  • 1 tsp dried oregano
  • 1 tsp dried parsley
  • 1 tsp dried thyme
  • 1/4 tsp cayenne powder
  • salt and black pepper to taste
  • a handful of parsley, chopped
For the seafood:
  • 8 large scallops 
  • 1/2 lb peeled and deveined shrimp
  • 1/4 lb white fish (I used Sablefish), cut into 2 inch pieces
  • 1-2 lbs crab legs
  • 1-2 tbsp potato starch
  • pinch of salt
  • pinch of paprika
  • 1/4 cup dry white wine
  • 2 lbs manila clams, scrubbed
What to do:
For the soup base:
  1. Using the SAUTE function of the instant pot, heat the butter and olive oil until melted. Add the onions into the pot and saute for 2-3 minutes, until fragrant. Add the carrots, celery, bell pepper, fennel and garlic. Saute for about 5 minutes until the veggies have softened. Add the dried thyme, dried parsley, dried oregano, and cayenne powder. Stir to coat the veggies. Season with a pinch of salt and black pepper. 
  2. Add the crushed tomatoes, clam juice, tomato paste and Worchestershire. Stir. Cover and set the Instant Pot to cook for 30 minutes on HIGH pressure. In the meantime, prepare the seafood. 
  3. Allow the Instant Pot to naturally release pressure for 10 minutes after it finishes. 
For the seafood:
  1. In a cast iron skillet, heat 3 tbsp olive oil or butter over medium high heat. Working in batches, dredge the scallops, fish, and shrimp in the potato flour, paprika, and salt. Shake off excess flour and fry (in batches), until just starting to brown (about 45 seconds to a minute each side). Remove seafood with a slotted spoon. Repeat until all the scallops, fish and shrimp are cooked. Set aside. Fry the crab legs for a minute on each side. Remove and set aside. 
  2. Deglaze the pan with 1/4 cup white wine, scrapping up the brown bits on the bottom of the pan. Add the clams and cover. Steam for about 5 minutes or until the the clams have all opened. Discard any that are not open. Remove from heat. 
  3. After a 10 minute natural release, manually release the pressure. Open the lid and add all the seafood except the clams. Close the lid and set the Instant Pot to cook on HIGH for 5 minutes. 
  4. Manually release pressure after it completes, open the lid and add the clams and all the juices. Stir. 
  5. Serve with chopped parsley and toasted bread. 


Wednesday, May 24, 2017

Instant Pot Garlic Pepper Spare Ribs


I live in a small one bedroom apartment with a tiny kitchen. I do not have any open counter space because I own a million kitchen appliances. You name it, I probably have it. And currently, my new favorite is the Instant Pot! I recently upgraded to the newest model, well, because it has a pretty blue LCD screen and a fancy turn dial. But new model or not, it's awesome. I've been pretty busy the last few months with work travel and fun travel that I've been neglecting my normal weekend meal prep. That's where this Instant Pot comes in! It cuts down my cook time so much that I'm able to prep everything all before the sun goes down. I've only ever made stew and braises in my Instant Pot and I wanted to give ribs a whirl. Well, they came out amazingly tender and so flavorful! 

Instant Pot Garlic Pepper Spare Ribs

What you'll need:
  • 1.5-2 lbs pork spare ribs, trimmed
  • 1/4 cup coconut aminos or gluten free tamari
  • 2 tbsp fish sauce (I used Red Boat)
  • 3 tbsp whole black peppercorns
  • 7-10 garlic cloves, peeled
  • small handful cilantro
  • 2 stalks scallions, roughly chopped
What to do: 
  1. In a food processor, combine, the coconut aminos (or tamari), fish sauce, black peppercorns, garlic cloves, cilantro, and scallions. Pulse until a thick paste - like mixture forms. 
  2. Place the spare ribs in the Instant Pot and pour the marinade over the ribs. Massage the marinade into the pork. Flip the pork so it's meaty side down. 
  3. Replace the lid of the Instant Pot and manually set it to 22 minutes on High pressure. Allow the Instant Pot to do it's thing. 
  4. Once it's finished cooking, allow the Instant Pot to naturally release (allow the valve to depress on its own). Preheat the oven to 450F. 
  5. Carefully, remove the ribs from the Instant Pot and place on a silicone lined baking sheet. Brush some of the juices onto the ribs. Roast for 6 minutes. Allow the ribs to rest before serving.
  6. The remaining juices can be reduced and used as a dipping sauce. 


Friday, May 19, 2017

Spicy Bacon Chili Meatloaf


Every week, I like to plan my meals. I pick one or two different types of protein and make enough of it to last the entire week. This week, while visiting home for Mother's Day and feeling a little uninspired in the kitchen, I asked my sister for what I could make with some of the items in my freezer. I had ground beef and chuck roast. Sister suggested chili. That's when a got that tingle in my toes and a light bulb went off, "what if I combined chili and meatloaf into one?!" And BAM! My Spicy Bacon Chili lost a little sauce, but made up for in looks! How yummy does this meatloaf look? So anyway, Thanks Sister! You The Best!

Spicy Bacon Chili Meatloaf

What you'll need:
  • 1 lb ground beef (or ground turkey)
  • 1/2 large onion (softball size), roughly chopped
  • 1 small - medium green bell pepper, roughly chopped
  • 6 oz white button mushrooms
  • 4 garlic cloves
  • 1.5 tbsp chili powder
  • 1 tbsp paprika
  • 2 tsp garlic powder
  • 2 tsp cumin
  • 1 tsp dried oregano
  • 1 tsp cayenne
  • 1 tsp black pepper
  • 1/2 tsp kosher salt
  • 4-6 oz bacon, fried and roughly chopped
  • 1 tbsp gluten free Worcestershire (or coconut aminos)
  • 1/3 cup salsa (I used 505 Southwestern hatch chili salsa, found at Costco!) 
  • 1 egg
  • 1 cup chunky pico de gallo (homemade or storebought)
What to do:
  1. Preheat your oven to 350F. Add the ground beef/turkey to a large bowl. Add the chopped onions, bell pepper, and garlic cloves to a food processor and pulse until finely minced. Drain the juices using a fine mesh sieve, get out as much water from the onion mixture. Add to the large bowl with the ground meat.
  2. Clean and remove the mushroom stems and add to the food processor. Pulse until it resembles ground meat. Add the ground mushrooms to the large bowl with the onion mixture. Add the spices, Worcestershire, 1/3 cup salsa, egg and bacon. Using clean hands or a spatula, mix the meatloaf mixture until just combined. 
  3. Pour the meat mixture to a loaf pan and roughly shape into an even sized loaf. Pour the chunky pico de gallo over the top and bake the meatloaf at 350F for 60 minutes. 
  4. Remove from oven and allow to cool before serving. 

Tuesday, February 21, 2017

Spaghetti Squash Tacos


If I had to pick one food to eat for the rest of my life, I think I might choose tacos. I LOVE tacos. I mean, you can pretty much put anything into a tortilla and call it a taco. You can even use lettuce as the tortilla and call it a taco. Wait, does that still count as a taco? Anyway, these spaghetti squash tacos were posted to my Instagram awhile ago, but these were so tasty I had to memorialize them on the blog. Not only are they delicious and healthy, they're also low carb! So my friends who count macros, go ahead an enjoy your tacos. 

Spaghetti Squash Tacos

What you'll need:
  • 1.5 - 2 lb spaghetti squash
  • 2 tsp olive oil
  • 1/2 tsp salt + 1/2 tsp black pepper
  • 1 large egg, whisked
  • 2 tsp garlic powder
  • 1/2 oregano
  • favorite taco ingredients: pulled pork, carne asada, avocados, guacamole, salsa, fresh cilantro, etc
What to do:
  1. Preheat oven to 400F. Split the spaghetti squash length wise. Season each half with the olive oil, salt and pepper. Rub the seasoning into the squash for even coverage. Roast the squash for 40-45 minutes at 400F. 
  2. Remove from the oven and allow to cool (about 8-10 minutes). Use two forks to shread the squash into a large bowl and season with the garlic power and oregano. Stir in the whisked egg until evenly coated. 
  3. Using a 1/4 cup measuring cup, divide the squash into rounds and flatten each round into a flattened tortilla shape, about 1/4 inch or less thick. Repeat for remaining squash mixture.
  4. Bake at 400F for 12-15 minutes or until edges have browned.
  5. Remove from oven and cool slightly. Prepare tacos using your favorite toppings. Enjoy!


Monday, January 30, 2017

Crab Cake Salad


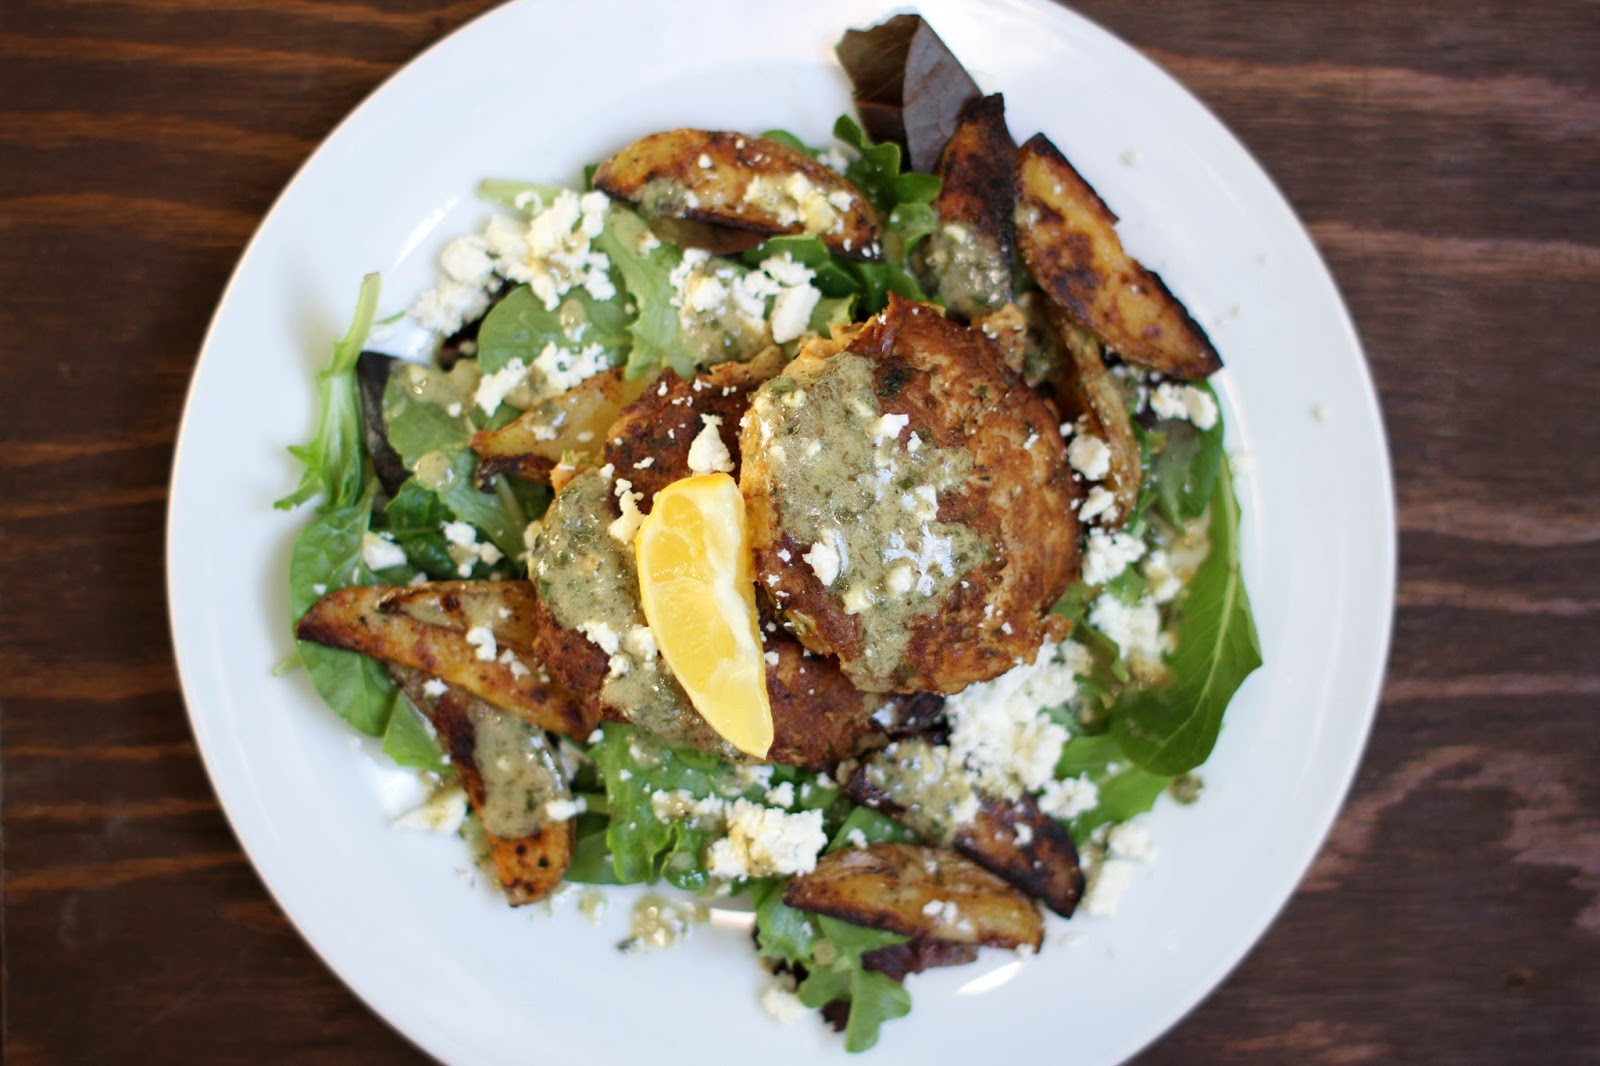
The other day, while strolling the aisles of my local Trader Joe's, I came across lump crab meat in the freezer section. Without a lick of hesitation, I grabbed a box and headed straight for checkout (I already had way too many unnecessary items in my basket). I can't say no to a good crab cake. One of my favorite brunch menu items are Crab Cake Benedicts, if a restaurant has got them, I'm ordering them. Anyway, I threw together a bunch of seasonings and a few binders and voila! I made myself some crab cakes. I had some leftover potato wedges from the night before, so I warmed those up in a pan and threw those on top of my salad. If you've never had a warm potato salad, I must insist you try it! You won't be disappointed. 

Crab Cake Salad

What you'll need:
  • 8 oz lump crab meat
  • 1 whole egg
  • 1 heaping tbsp mayonnaise (I used Chosen Food's new Harissa Avocado Mayo)
  • 1 tsp fresh lemon juice
  • 1 tsp dijon mustard
  • 1/2 tsp chili powder
  • 1/4 tsp cayenne
  • 1/2 tsp dried dill
  • 3/4 tsp garlic powder
  • 1/2 tsp dried parsley
  • 1 tbsp chopped fresh cilantro
  • 2 tbsp green bell pepper, finely minced
  • 1/3 cup almond flour
  • 1/4 tsp salt + 1/4 tsp black pepper
  • salad greens
  • potato wedges or cubes, or even tator tots
  • feta cheese (optional)
What to do: 
  1. In a bowl, whisk together the egg, mayo, lemon juice, dijon mustard, chili powder, cayenne, dill, parsley, and garlic until combined. Stir in the lump crab meat, bell pepper, and cilantro until just coated. Add the almond flour and salt and pepper. Stir to combine. 
  2. Use an ice cream scoop to evenly divide the crab mixture. Roll into a ball and carefully flatten into a disk (use a light touch). Set them aside on a plate. I was able to make four 2.5-3 inch crab cakes. Heat a cast iron or other heavy bottom pan with olive oil (or ghee!) over medium heat. 
  3. Carefully place the crab cakes into the pan and let them cook about 8-10 minutes on medium low. Cover the pan after about 4-5 minutes. Remove the lid and flip. Cook for another 8-10 minutes or until the cakes have browned. 
  4. Serve atop a bed of salad greens, with warmed potatoes and feta cheese. Toss with your favorite dressing, or just a lemon wedge!


Thursday, January 26, 2017

Chicken Enchiladas (Instant Pot)


Lately, I've been feeling rather uninspired in the kitchen. Maybe it's all this rain we've been getting in California that makes me not want to do anything but, Netflix and Chill. But anyway, I can't blame the rain, I actually like it. So the other day, I was rummaging through my freezer (I have one of those fridge/freezers with the freezer on the bottom where things just get lost in the abyss, so to speak), and I found a half full container of red tomatillo salsa I had made for this recipe I guest posted over at my friend, Steph's website, Stupid Easy Paleo. Then I thought to myself, enchiladas! They're relatively simple to whip up and always delicious. I was also able to scrap together enough frozen chicken thighs to make a decent sized meal. BUT, they were frozen. And I was hungry, like yesterday.

Since I was in a pinch, I remembered that my Instant Pot can pretty much cook a whole meal in about 30 minutes or less. This was my first time actually cooking with it; I've only ever made bone broth with it. First time for everything, Am I Right? Anyway, feel free to use your own enchilada sauce in place of the tomatillo salsa.

Chicken Enchiladas

What you'll need:

  • 2 lbs chicken thighs/breast (I used thighs and trimmed the excess fat)
  • 1 small onion, sliced
  • 3 garlic cloves, minced
  • 1 shallot, minced
  • 1/2 cup red tomatillo salsa (recipe below) + additional 1/2 cup for layering
  • 2 tbsp tomato paste
  • 2 chipote peppers in adobo sauce, roughly chopped
  • pinch of salt and fresh cracked black pepper
  • 1/4 cup water or broth
  • tortillas (homemade or storebought)
  • smoked mozzarella, crumbled feta (optional, or use your favorite cheese)
  • chopped cilantro, for garnish

    Ingredients for red tomatillo salsa
  • 1/2 lbs tomatillos, husked removed and rinsed
  • 5 garlic cloves, unpeeled
  • 2 dried Guajillo chili peppers, seeds removed
  • 2 dried California or New Mexico Chile peppers, seeds removed 
  • 1 cup hot water
  • juice of 1/2 lime
  • 1/2 cup cilantro, roughly chopped
  • 1 tsp salt
  • 1/2 tsp black pepper
  • 1/2 tsp cumin seeds
  • 1 tsp oregano, preferably Mexican oregano
  • 1-2 tsp honey, optional

What to do:

To make the red tomatillo salsa
  1. Place the tomatillos, garlic, and onions on a baking tray. Drizzle with a little olive oil and broil for 10 minutes. In the meantime, toast the dried chili until they start to blacken. Remove from heat and place the dried chilies in a bowl of hot water. Allow the chilies to rehydrate in the hot water for 30 minutes. Using the same pan, toast the cumin seeds and dried oregano until fragrant (approximately 2-3 minutes), remove from pan and add to a blender/food processor. 
  2. Check the tomatillos after the 10 minutes and flip to broil the other side for an additional 5-7 minutes. Remove the tomatillos, onions and garlic from the oven and allow to cool slightly. Peel the garlic cloves. Add to the same blender/food processor as the toasted spices. To the blender, add the cilantro, lime juice, salt and pepper, rehydrated chilies, and 1/4 cup of the pepper water (water that was used to rehydrate the chilies). Pulse to combine. Taste, and season if needed. Stir in honey if it's too tart.
To make the enchiladas
  1. Set the Instant Pot to, "Saute" Allow the pot to heat up for about 3-5 minutes, with the lid off. Add 1 tbsp of oil along with the onions, garlic, and shallots. Saute until fragrant, about 8-10 minutes. Add the tomato paste and chopped chipotle peppers and stir to coat. Add the chicken in a single layer and top with 1/2 cup of salsa (or enchilada sauce) and 1/4 cup water or broth. Replace the lid and turn to lock. Set the Instant Pot to "Poultry" and let it work it's magic (about 15 minutes actual cook time, but give the Instant Pot time to build up pressure).
  2. Meanwhile, preheat your oven to 400F. Make your tortillas (I used Steph's recipe) or prepare storebought ones. Assemble your enchilada toppings, cheese, sauce, etc in a manageable line. Once the chicken is done cooking, release the vent of your instant pot. Remove the lid once it has completed venting and shred the chicken. 
  3. Spread 1/4 cup sauce/salsa on the bottom of a 9 x 13 baking dish. Place some shredded chicken and cheese in the center of the tortilla. Roll up to contain the filling. Place the tortilla, seam side down in the baking dish. Repeat with the remaining tortillas (I rolled about 8). Pour the remaining 1/4 cup sauce/salsa  over the top. Sprinkle top with cheese and bake at 400F for 15-20 minutes. Or until it is bubbly and cheese is melted and browned. Garnish with chopped cilantro. 

Monday, August 8, 2016

Asian Braised Oxtail/Short Ribs


Braises and stews are staples in my kitchen. They're easy to prep and I let my slow cooker do the rest. Occasionally I like to use my fancy pants dutch oven too. When it comes to using meaty bones, I like to brown the meat (either in a cast iron or broil in the oven) first. Those brown bits at the bottom of your pan are like gold. Here, I seasoned the meat with a little Chinese 5 spice and then pan seared them before adding the rest of the ingredients. If you've never tried Chinese 5 spice, it's an aromatic blend of star anise, cinnamon, cloves, sichuan peppercorns, and fennel. Some variants have ginger and cardamon. But it adds such amazingly complex flavors, it's definitely worth a try. In this recipe, I opted to use Oxtails and Short ribs, but you can go ahead and use any meaty bone.

Asian Braised Oxtail/Short ribs

What you'll need:
  • 2-3 lbs beef oxtail, ribs, or short ribs
  • 5 tbsp gluten free tamari or coconut aminos
  • 2 tbsp mirin
  • 1/2 tsp paprika
  • 1-2 tbsp chinese five spice + 1/2 tsp for sauce
  • 1.5 tsp FlavorGod Garlic Lovers (or use garlic powder)
  • 1/4 tsp white pepper
  • 1/4 tsp dried mustard
  • salt and pepper, to taste
  • 2 cups beef/chicken stock (I used homemade)
  • 1 tbsp honey
  • 6-8 oz dried shiitake mushrooms (fresh would be okay too)
  • 2-3 minced garlic cloves
  • 1 one inch piece of peeled ginger
What to do:
  1. Preheat oven to 300F. Pat the beef dry. Season all sides with 1-2 tbsp chinese 5 spice, a couple large pinches of salt and fresh cracked black pepper. In a cast iron pot, heat 2 tbsp of fat of choice over medium high heat. Working in batches as to not overcrowd the pot, sear the beef on each side (about 1-2 minutes each side). Remove and set aside. 
  2. Add the ginger and garlic, scraping the bottom for the browned bits. Add the tarmari/coconut aminos, mirin, honey, paprika, 1/2 tsp chinese 5 spice, garlic powder, white pepper, and dried mushrooms to the pot. Stir. Place the beef back into the pot. Add the stock and the dried mushrooms
  3. Bring the mixture to a boil. Cover with an oven proof lid and place in the oven to bake for 2.5-3 hours. After 3 hours, remove from the oven and place the pot on the stove. Remove the cover and bring the stew to a simmer over medium heat. Allow the sauce to thicken for 25-30 minutes over medium heat. 
  4. Serve with chopped green onions (optional) over rice or cauliflower rice (for low carb/paleo) and your favorite sauteed veggie (I served mine with bok choy). 


Monday, August 1, 2016

Cherry Clafoutis


In the summer, I crave cherries. I freaking love cherries. But I hate those pits! I finally got myself a cherry/olive pitter and wow, why didn't I get one sooner?! It's probably my favorite kitchen accessory, second to my waffle maker (duh!). When summer rolls around, it's cherries all day, every day. Anyway, clafoutis, sounds funny, right? This classic French dessert combines juicy cherries and a rich, but light textured custard. All it takes is a blender, about 40 minutes of bake time, and BAM you've got a funny named but delicious treat, even perfect for breakfast! You can even substitute the cherries for another fruit, like peaches or berries.

Cherry Clafoutis
What you'll need:

  • 1 cup coconut or almond milk
  • 1/3 cup maple syrup + 2 tsp honey
  • 3 whole eggs
  • 2 tsp vanilla
  • 1/2 cup almond flour
  • 1.5 tsp tapioca flour
  • 2 tbsp melted grassfed butter
  • pinch of salt
  • 2-3 cups pitted cherries or other fruit
What to do:
  1. Preheat the oven to 350F. Grease a cast iron skillet or baking dish with soften butter or non-stick spray (I used Chosen Foods coconut oil spray, no propellants or fillers just pure coconut oil!). 
  2. Add all the ingredients, except the fruit to a blender or food processor. Blend until smooth. Pour about 1/4 of the batter into the greased skillet/dish and bake at 350F for 7-10 minutes. This helps to keep your fruit from all sinking to the bottom. 
  3. Remove from the oven and top with the fruit, arranging in a pattern, if preferred. Pour over the remaining batter. Return the skillet/dish back to the oven and bake at 350F for an additional 35-40 minutes until the top is set and golden brown. 
  4. Remove from oven and cool slightly, sprinkle with powdered sugar if preferred. Serve warm. 


Tuesday, July 26, 2016

Small Batch Chocolate Chip Cookies


Sometimes, you just want a chocolate chip cookie. But you don't want to go to the store to buy those pre-portioned ones just to make 1 or 2 cookies when you've got all the ingredients at home. But how difficult would it be to pull out a dozen plus fresh baked cookies from the oven and not eat them all in one sitting?! This recipe only makes two cookies, perfect for an after dinner treat when you just want a little sweetness. I've played around with this recipe and depending on whether or not you chill the dough will give you two different textures. Baking the cookies right away will give you crispy edges and a soft center. Chilling the dough for at least 5 minutes, will give you a soft baked cookie all the way through. The choice is yours, now lets get baking!

 Small Batch Chocolate Chip Cookies

What you'll need:

  • 2 tbsp grassfed butter (like Kerrygold), soften at room temperature
  • 2 tbsp maple sugar
  • 1/4 tsp vanilla
  • 1 egg yolk
  • 2 tbsp tapioca
  • 4 tbsp almond flour
  • 1/4 tsp baking soda
  • pinch of salt
  • 3 tbsp chocolate chips or chopped dark chocolate
What to do:
  1. Preheat the oven to 350F. In a bowl, beat the soften butter and maple sugar together until combined. Add the vanilla and egg yolk and beat until just combined. 
  2. Add the tapioca, almond flour, baking soda and salt. Beat until just combined, it's okay if there are small streaks. Fold in the chocolate chips. 
  3. Chill dough for at least 5 minutes for soft baked cookies. Divide the batter using an ice cream scoop onto a parchment paper or silicone lined baking sheet, about 3 inches apart. 
  4. Bake the cookies at 350F for 8-10 minutes. Cool slightly before enjoying!


Monday, June 13, 2016

Salted Almond Coconut Chocolate Candy Bites

I recently had the pleasure of finally meeting the face behind one of my favorite brands, Nikki of Nikki's Coconut Butter, at Paleo F(x) in Austin. She's one awesome boss lady and one of the sweetest people I've ever had the pleasure meeting! It certainly was a happy coincidence that I was just vacationing in Austin with my BFF and decided to stop by the expo at Paleo F(x). So glad we did! 

Since changing my diet one that's Paleo/gluten free, I've found ways to satisfy my sweet tooth with Nikki's coconut butter. All the flavors are soy, dairy, egg, and gluten free. The newest flavor, Cashew Cookie Butter, is also sugar free, for those that are watching their sugar intake. It's also one of my personal favorites, next to the Mint Chocolate Chip (yum!). Being creative in the kitchen is a great outlet for me, when I'm stressing, I like to have fun in the kitchen whipping up something fun and delicious. So, when I'm in the mood for something a little sweet (I'm normally a salty, chips and dip, kinda girl), I like incorporating a little Nikki's coconut butter. It's got all the sweetness I need and the recipes I'm going to share with you include little to no added sugars (except for those already found in the coconut butter or fruits, YAY!). Coconut Butter has so many potential uses and I'm going to try to create all the recipes I can to show you just how versatile it can be!

Now for the Salted Almond Coconut Chocolate Candy Bites. Think of these as a more "grown-up" version of Almond Joy Candies. The extra step of salting and roasting the almonds really take these to the next level. 


Salted Almond Coconut Chocolate Candy Bites

What you'll need:


  • 1/2 cup raw almonds
  • 1 tbsp kosher salt + 1 cup boiling water
  • 2 cups shredded, unsweetened coconut
  • 1/4 cup Nikki's Vanilla Cake Batter, melted
  • 3 tbsp coconut cream (from canned coconut milk)
  • 1-2 tbsp honey, warmed 
  • 1 tsp vanilla
  • 1/2 tsp kosher salt
  • 4 oz good quality dark chocolate + 1/4 cup Nikki's Dark Chocolate Fudge Coconut Butter


  • What to do:
    1. Preheat oven to 300F. In a bowl, add the raw almonds and 1 tbsp kosher salt, add the boiling water and allow the almonds to brine for at least 15 minutes. After 15 minutes, drain the almonds and pat dry. Bake at 300F for 20 minutes. 
    2. Remove and allow almonds to cool slightly. In a food processor, combine the almonds, shredded coconut, Vanilla Cake Batter, coconut cream, honey, vanilla, and kosher salt. Pulse until mixture starts to form a ball/or comes together but not enough to turn into a smooth puree. 
    3. Using a small cookie scoop, or your hands, form the coconut mixture into uniform shapes. Set aside and melt together the dark chocolate and Nikkis Dark Chocolate Fudge. Dip each coconut ball into the chocolate. Allow to harden in the fridge before consuming. Store in the fridge or freezer in an airtight container. 

    Wednesday, June 8, 2016

    Japanese Style Crispy Chicken Wings (Teba No Karaage)


    I love a good crispy chicken wing. Crunchy skin, tender meat and usually greasy was my preference...back in the debaucherous days of college. Now, you could say, I've grown up (a little) and my tastes have gotten a little more sophisticated. Enter, these Japanese Style Crispy Chicken Wings. These are lightly coated in potato starch to give the outside the crispiest crunch without being too over powering. I also fried these in olive oil, making these "better" for you. HAHAHA.   


    Japanese Style Crispy Chicken Wings 

    What you'll need:
    • 2 lbs chicken wings/mini drum sticks
    • 2 tbsp gluten free Tamari/coconut aminos
    • 1 tbsp mirin/rice wine
    • 1 tsp FlavorGod Garlic Seasoning (or garlic powder)
    • 1 inch piece of ginger, minced
    • 2 garlic cloves, minced
    • 2 tsp sesame oil
    • Potato starch
    • FlavorGod Garlic Herb Salt (or salt/fresh cracked pepper)
    • Olive oil, for frying
    • Japanese chili powder (optional)


    What to do:
    1. Prepare the marinade by combining the Tamari/coconut aminos, mirin, garlic powder, minced garlic and ginger, and sesame oil. Pour over chicken wings (placed in bowl) and toss to coat. Cover with plastic wrap and allow the chicken to marinate for at least 4 hours in the fridge.
    2. Heat 2" olive oil in a small saucepan over medium until a deep-fry thermometer reads 320°. Alternatively, if you’ve got a mini fryer, fill olive oil to the fill line. In a large bowl, combine 1 cup of potato starch and 1 tsp Garlic Herb Salt/ salt + pepper.
    3. Remove the chicken from the marinade and toss wings in potato starch mixture, shaking off excess; working in batches, fry wings until crisp, about 5-8 minutes. Transfer wings to paper towels to drain. Serve with lemon wedges and Japanese chili powder (optional).

    Monday, June 6, 2016

    Hong Shao Rou (Shanghai Style Red Braised Pork Belly)


    Hong Shao Rou or "Red Braised" Pork Belly is one of my favorite ways to prepare and enjoy pork belly.  A little salty and a little sweet, but Oh So Delicious. The pork belly gets browned and crispy first, then braised in a mixture of salty sweet goodness. This is one of those comfort food type meals growing up so I wanted to put my spin on it by making it gluten free and "paleo" friendly (if you can tolerate rice), but also keeping it true in flavor and texture. :) 

    Hong Shao Rou

    What you'll need:
    • 1.5-2lb pork belly, cut into ~ 1 inch pieces
    • 2-3 garlic cloves, smashed and peeled
    • 1 inch piece of fresh ginger, peeled
    • 5 tbsp coconut aminos/gluten free Tamari
    • 1.5 tbsp rice vinegar
    • 1 tbsp mirin/rice wine/dry sherry
    • 1/4 tsp paprika
    • 1 tsp FlavorGod Garlic Seasoning (or use 1 tsp garlic powder)
    • 1 tsp white pepper
    • 1 tsp ground ginger
    • 3 tbsp raw honey
    • 1 tbsp maple sugar/1 piece rock sugar (optional)
    • 1/2 cup water
    • 2 tbsp cooking fat
    What to do:
    1. In a bowl, combine the coconut aminos/Tamari, rice vinegar, mirin/rice wine, paprika, garlic, white pepper, and ground ginger. Whisk to combine and set aside.
    2. In a large pot, add 2-3 cups water, smashed garlic cloves and fresh peeled ginger. Bring to a boil over medium high heat. Once boiling, add the pork belly cubes. Bring the water back to a boil and allow the pork to simmer for 5 minutes. Drain the pork belly and remove the garlic and ginger pieces. Pat the pork dry. 
    3. Using a heavy bottomed wok or cast iron pot, add 2 tbsp cooking fat over medium high heat. Working in batches, fry each side of the pork belly until browned and crispy. Remove and drain on paper towels. Repeat for remaining pork belly. 
    4. Turn the heat down to medium, working with the same wok/cast iron pot, carefully add the raw honey and maple sugar (if using). The mixture will bubble rapidly. Then, carefully add the water. Stir in the coconut aminos/Tamari mixture. Place the pork belly back into the pot, stir to coat and cover. Allow the pork to simmer for 25-30 minutes. Stirring occasionally. 
    5. Remove cover and allow the sauce to thicken for 5-8 minutes. Serve with fresh chopped chives and sesame seeds over riced cauliflower or white rice. 


    Tuesday, May 17, 2016

    Patacon Pisao (Plantain Sandwich)


    So, I stumbled upon this deliciousness while browsing the interwebz. You know how you click on one link, only to find yourself randomly clicking on something else, then you're on some website that's completely unrelated to what you were originally look at? Yea, that happens to me a lot. But anyway, that's how I found out about Patacon Pisao. Patacons are basically the Venezuelan equivalent of giant tostones, used as tostadas or sandwich "buns." Freaking. Genius. There's a restaurant in New York that's tooted as having the most authentic Patacon Pisao, which consists of "shredded beef, special sauce, ketchup, lettuce, tomato, fried cheese, on a double fried plantain bun." I've never actually had one before...but I did a quick internet search and sort of put my spin on it (aka, used whatever I had in my fridge/pantry). I think the flavors would be pretty close, so any of my friends who've had a Patacon Pisao, please let me know if this one is close! 

    Patacon Pisao

    What you'll need
    • green plantains
    • salt
    • 2 tbsp oil
    • 1.5 lb rump roast
    • 1/2 large onion (softball size), diced
    • 1 medium green bell pepper, diced
    • 3 garlic cloves, minced
    • 1.5 tsp gluten free Worcestershire 
    • 2 tbsp tomato paste
    • 1 tbsp ketchup
    • 1 tbsp FlavorGod Chipotle (or 1 tbsp chili powder + 1 tsp smoked paprika)
    • 1/2 cup beef broth (I used homemade)
    • 1/4 tsp cumin
    • 1 bay leaf
    For the avocado cream sauce
    • 2 medium avocados
    • juice of 1/2 lime and 1/2 lemon
    • 1/4 cup fresh cilantro, roughly chopped
    • 1/2 cup onion, roughly chopped
    • 1 jalapeno, seeds removed, roughly chopped
    • 1 tsp FlavorGod Garlic Lovers (or 1/2 tsp garlic powder)
    What to do:
    1. Make the avocado cream sauce by adding all the ingredients to a blender or food processor. Puree until smooth. Set aside. The cream sauce can be made a day in advance.
    2. To make the shredded beef, liberally season the rump roast with salt. Heat 2 tbsp oil over medium high heat in a heavy bottom pot. Sear each side of the roast for 2-3 minutes over medium high heat. Remove and place in the pot of a slow cooker. 
    3. To the heavy bottom pot, add the onions and bell peppers. Saute for 3 minutes, then add the garlic. Be sure to scrape the bottom for all the brown bits! Saute for another 2 minutes. Add the Worcestershire, tomato paste, ketchup, chipotle (or chili powder/paprika), and cumin. Cook for an another minute before adding the beef broth. Bring the mixture to a simmer and allow to simmer for 5 minutes, stirring occasionally. 
    4. Add the sauce mixture to the slow cooker, cover the roast and add the bay leaf. Cook on low for 8 hours. Shred meat and mix with sauce. Set aside to make the fried plantain buns.
    5. Cut the ends off of green plantain and remove peel. Cut plantain down the middle, lengthwise. Then cut in half, horizontally. Fry each side of plantain for 2-3 minutes or until slightly browned. Remove from oil and flatten two halves until about 1/4 inch thick. Fry flattened plantains again for another minute on each side. Remove from oil and season with salt. 
    6. Assemble the sandwiches with shredded beef, avocado cream sauce, lettuce, and tomato. I omitted the cheese, but if you like, a little fried cheese would be delicious!

    Tuesday, March 29, 2016

    Butter Chicken


    Piping hot Butter Chicken is like a hug on a plate. I feel the same way about Chicken Tikka Masala. Both dishes require a marinade of chicken in fragrant spices and tangy yogurt and then simmered in a bath of flavorful tomatoes. But Butter Chicken, in my opinion would definitely be classified as a more "luxurious" hug...can hugs be considered luxurious?  There is butter in this dish, but not enough to call Paula Deen over for dinner. I eliminated the yogurt and replaced it with full-fat coconut milk and some apple cider vinegar (lemon juice would work too), for an almost dairy-free dish. You can't call it "Butter Chicken" if there's no butter in it, right?!


    What to do:

    Butter Chicken Marinade
    • ½ cup full fat canned coconut milk
    • ½ tsp apple cider vinegar or fresh lemon juice
    • 1.5 lbs boneless chicken thigh, cut into 1 inch cubes
    • 2 tbsp tomato paste
    • 1 tsp garam masala
    • 2 tsp paprika
    • ½ tsp cayenne
    • 1 tsp cumin
    • 1 tbsp fresh ginger root, finely minced
    • 3-4 gloves garlic, finely minced
    • 1 tsp FlavorGod Garlic Herb Salt (use sea salt if you don't have this)
    • 2 tsp harissa spicy sauce (Moroccan red pepper sauce); optional


    Sauce
    • ½ cup, mix of red and yellow onion, halved then sliced
    • 1/3 tsp garam masala
    • 2/3 tsp FlavorGod Garlic Lovers (replace with garlic powder)
    • 1 cup canned fire roasted tomatoes, diced
    • scant 1 tsp honey (adjust to taste)
    • 2 tbsp full fat canned coconut milk
    • 2-3 tbsp unsalted butter
    • 1-3 tbsp cilantro, chopped for garnish
    What to do: 
    1. In a small bowl, combine the coconut milk with apple cider vinegar/lemon juice. Stir and set aside. In a large bowl, combine the remaining marinade ingredients and mix until the chicken is evenly coated. Stir in the coconut milk mixture. Cover with plastic wrap and marinate overnight.
    2. Preheat oven to 350F. In an oven proof pot, heat 1-2 tbsp of butter over medium high heat. Saute the onions until soft and fragrant (about 2-3 minutes). Add the FlavorGod/garlic powder and garam masala. Stir to combine. Add the canned tomatoes and let cook for additional 2-3 minutes.
    3. Add the chicken, with all its marinade to the onion/tomato mixture along with the honey, coconut milk, and remaining tablespoon of butter. Bring the mixture to a soft simmer for 5 minutes. Cover with foil/parchment paper or oven safe lid and bake at 350F for 25 minutes. Remove the lid and continue baking for an additional 8-10 minutes.
    4. Serve with fresh chopped cilantro and a side of rice/cauliflower rice.   
    Note: This dish can also be made in a slow cooker. Prepare all the way to Step 3, bringing the mixture to a soft simmer for 5 minutes. Pour the butter chicken into the pot of a slow cooker and cook on low for 2-3 hours. 

    Monday, February 22, 2016

    Dairy-Free Creamy Cajun Alfredo Pasta Bake


    Every once in awhile, I find myself falling back into the warm comfort of pasta. I don't eat pasta often, but when I do, I find myself just eating the real thing. Spaghetti squash is great and everything, but nothing beats the chewy soft texture of pasta. Thank goodness for brown rice pasta! This sauce is made dairy free by using cauliflower. It's as easy as a quick saute and then a puree. It's great to hide those veggies for the little kidos who might be a little picky. 

    Dairy Free Creamy Cajun Alfredo Pasta Bake

    What you'll need:

    • 1lb brown rice pasta
    • 1/2 lb andouille sausage, sliced
    • 1 lb large raw shrimp, peeled and deveined
    • 1/2 cup white onion, chopped
    • 1 small shallot, minced
    • 3-4 garlic cloves, minced
    • juice of 1/2 lemon
    • 2 tsp dried parsley
    • 1 tbsp Cajun Seasoning (I used FlavorGod Cajun seasoning)
    • fresh cracked black pepper

    For the sauce

    • 5-6 garlic cloves, minced
    • 1 cauliflower head, roughly chopped
    • 1 tbsp garlic powder
    • 1.5 cups chicken stock (homemade preferred)
    • 3 roasted red peppers, roughly chopped
    • 1 small shallot, minced
    • 3 tbsp Cajun seasoning (I used FlavorGod Cajun seasoning)
    • 2 tbsp tomato paste
    • juice of 1/2 lemon
    • salt and black pepper to taste

    What to do:

    1. Prepare the cauliflower for the sauce by removing the green stems and roughly chopping into manageable chunks. Process in a food processor until the size of a grain of rice, one head of cauliflower should yield about 4 cups. Heat a large sauce pan over medium heat with one tablespoon of oil. Saute 1/2 the amount of minced garlic until fragrant. Add the riced cauliflower to the pan and cook for 4-5 minutes. Season with garlic powder. Add 1.5 cups of chicken stock and bring to a boil. Once boiled, turn heat down to medium low, cover and simmer for 20 minutes. After 20 minutes, pour into a high powdered blender and puree until smooth. Set aside. 
    2. In a separate pan, saute the minced shallot and remaining garlic until fragrant. Add 1 tablespoon of Cajun seasoning to the shallot/garlic mixture, stir to coat. Add the roasted red pepper to a blender, along with the sauteed shallot/garlic mixture, tomato paste, and remaining 2 tablespoons of Cajun seasoning. Puree until smooth. 
    3. Combine the cauliflower puree and roasted red pepper puree into a sauce pan. Bring to a boil and allow to simmer for 15 minutes. Sauce can be made a day in advance, makes about 4 cups. 
    4. Preheat oven to 375F. Prepare pasta, boil for 5-7 minutes and drain. Set aside. Saute the onion, garlic, and shallot in a pan until fragrant. Add the sausage, and cook for 3 minutes. Add the shrimp, juice from 1/2 lemon, Cajun seasoning, dried parsley, and pepper. Stir and cook until most of the shrimp has turned pink.
    5. In a 9x13 inch baking dish, layer the bottom of the dish with about 1/4 cup of the cauliflower/red pepper sauce. Toss the pasta and the shrimp/sausage mixture. Add 1 cup of sauce and toss to coat. Bake at 375F for 30 minutes. Then broil for 5 minutes.  


    Tuesday, February 16, 2016

    Cajun Eggs Benedict with Crawfish Aioli


    So truthfully, this cajun eggs benedict dish is a little involved. But that shouldn't deter you from attempting to make them for someone special...or yourself! It's so worth it. I had actually made the cajun sauce for another recipe and had leftovers. I also had leftover crawfish from the night before from a crawfish boil (I wish backyard crawfish boils were more of a thing in Southern California), which I added to the sauce and turned into an aioli. The sauce makes about 4 cups, it's A LOT, more than enough for this dish (unless you'll be catering Sunday Brunch and plan on making eggs benedict for like 20 people...). I say, make the sauce, use it in a casserole or something, or freeze it in ziplock bags; 1 cup measured out into ziplock bags, air removed, and laid flat.

    Okay, on to the recipe. I suck at poaching eggs, I've tried every method out there, but all I would get would be ugly wispy whites that just stuck to the bottom of my pan. Anyway, I came across a video on Serious Eats that details the use of a mesh strainer. It worked! Catch that link and the recipe below.


    Cajun Eggs Benedict with Crawfish Aioli

    What you'll need:
    • 1 cup sweet potatoes, roasted and mashed
    • 2 tsp Cajun Seasoning (I used this one)
    • 1 tsp dried minced onion
    • pinch of salt and pepper
    • 2 cups baby spinach
    • 1/4 lb andouille sausage, thinly sliced
    • 1 lb crawfish, boiled and peeled, save shells
    • 2 poached eggs (directions for full proof poached eggs here)
    • crawfish aoli (recipe below)

    For the sauce
    • 5-6 garlic cloves, minced
    • 1 cauliflower head, roughly chopped
    • 2 tbsp garlic powder
    • 1 tbsp onion powder
    • 1 tsp parsley
    • 1 tsp chives
    • 1.5 cups chicken stock (homemade preferred)
    • 3 roasted red peppers, roughly chopped
    • 1 small shallot, minced
    • 3 tbsp Cajun seasoning
    • 2 tbsp tomato paste
    • salt and black pepper, to taste
    • juice from 1/2 lemon

    For the aioli
    • 1/4 cup mayonnaise
    • 1/2 cup sauce
    • 1 tbsp melted butter/ghee
    • juice from 1/2 lemon
    • peeled cawfish


    What to do: 
    1. Prepare the cauliflower for the sauce by removing the green stems and roughly chopping into manageable chunks. Process in a food processor until the size of a grain of rice, one head of cauliflower should yield about 4 cups. Heat a large sauce pan over medium heat with one tablespoon of oil. Saute 1/2 the amount of minced garlic until fragrant. Add the riced cauliflower to the pan and cook for 4-5 minutes. Season with garlic powder, onion powder, parsley and chives. Add 1.5 cups of chicken stock and bring to a boil. Once boiled, turn heat down to medium low, cover and simmer for 20 minutes. After 20 minutes, pour into a high powdered blender/food processor and puree until smooth. Set aside. 
    2. In a separate pan, saute the minced shallot and remaining garlic until fragrant. Add 1 tablespoon of Cajun seasoning to the shallot/garlic mixture, stir to coat. Add the roasted red pepper to a blender, along with the sauteed shallot/garlic mixture, tomato paste, and remaining 2 tablespoons of Cajun seasoning. Puree until smooth. 
    3. Combine the cauliflower puree and roasted red pepper puree into a sauce pan. Season with salt and pepper, to taste. Add juice of 1/2 lemon. Bring to a boil and allow to simmer for 15 minutes. Sauce can be made in advance, makes about 4 cups. Allow to cool completely before freezing. 
    4. Note: This step is completely optional, but it'll definitely impart more "crawfish" flavor into the sauce.  Add the peeled crawfish shells, ~ 1 cup of the cauliflower/roasted red pepper sauce, and about 1/4 cup water to a sauce pan. Bring to a simmer and add juice of 1/2 lemon. Allow to simmer for about 15 - 20 minutes on low heat. Strain through a mesh strainer to collect the sauce and remove any shell pieces. This sauce will be used to make the aioli. Set aside. 
    5. Make the sweet potato waffles, by mixing, 1 cup of mashed sweet potato with the Cajun seasoning, dried onion and salt/pepper. Scoop 1/2 cup into waffle iron and make waffles per manufacturer instructions. Repeat with remaining 1/2 cup of mashed sweet potato. 
    6. Poach eggs, set aside in a bath of cool water until ready to plate. Meanwhile, saute spinach and sausage until sausage has browned and spinach has wilted. Set aside. 
    7. To make aoli, whisk together 1/4 cup mayonnaise, 1/2 cup cajun sauce (with or without the infused crawfish), juice of 1/2 lemon. Slowly add in melted butter/ghee while whisking constantly. Once combined fold in crawfish meat. 
    8. To assemble, top each waffle with spinach/sausage mixture, poached eggs (rewarm by removing from cool bath and into soft simmering water for 15-20 seconds), and crawfish aoli. 


    Friday, November 20, 2015

    Mini Cubano Plantain Bites


    Cuban food is AHHH-mazing. If you've never had a Cubano, or cuban sandwich, I suggest you either 1) make one for yourself (it's pretty simple) or 2) find a place that serves them. Have any of you seen the movie, Chef, with Jon Favreau? Great movie, btw. Favreau's character is a big time chef that receives a scathing review for his restaurant, falls into a depression and decides to start a food truck making Cuban food. What I wouldn't give to have been a character in the movie, eating those cubanos. Anyway, I digress. Here's my interpretation, lechon asado (cuban pulled pork), ham, pickle relish, dijon mustard on a crispy tostone (twice fried plantain). Oh. Em. Gee. Delicious.

    Mini Cubano Plantain Bites

    Ingredients:

    For the Tostones
    • Green plantain, peeled and sliced
    • coconut oil, for frying plantains
    For the Lechon Asado
    • 2-3 lb bone-in pork shoulder/pork butt
    • 5-8 cloves garlic
    • 3/4 cup fresh squeezed orange juice
    • 3/4 cup fresh squeezed lemon and lime juice (I juiced, 2 whole limes and 1.5 lemons)
    • 1 1/2 tsp cumin
    • 2 tsp dried oregano
    • 1/2 medium (baseball sized) onion, sliced
    • 1/4 cup fresh cilantro, roughly chopped
    • 1 TBSP salt
    • fresh cracked black pepper
    Remaining bites
    • nitrate free ham
    • finely diced bread and butter or sweet dill pickles
    • finely diced onions
    • dijon mustard
    Preparation:
    1. Pat dry the pork. Using a knife, make 5-8 (depending on amount of garlic used) one inch slits sparingly throughout the meat. Place a clove garlic in each slit. 
    2. Place the garlic stuffed pork is a large ziploc bag. Add the remaining lechon asado ingredients. Marinate the pork at least 6 hours or overnight. 
    3. The following day, remove the pork from the marinade. Place in a slow cooker. Add about 1/4 to 1/2 cup of the marinade to the slow cooker pot. Cook on low for 6 hours. Then turn up to high and cook for another 4 hours. 
    4. Remove the pork into a large bowl. Shred. Add a tablespoon of the liquid from the slow cooker pot at a time. I added about 4 to keep it moist and juicy. Store in an airtight container in the fridge until ready to use. 
    5. To make the tostones, cut off the ends of the green plantain. Peel the skin and slice (about 1/2 inch thick). Heat a cast iron skillet with coconut oil over medium high heat. Fry both sides of each plantain slice for approximately 1 minutes. Remove from skillet and using a flat bottomed cup/bowl/or other kitchen tool, smash each plantain slice into a disk. Fry both sides of each smashed plantain disk for another 1 minute or until golden brown. Remove and drain on paper towels. 
    6. To assemble, top each tostones with sliced ham, the lechon, finely diced pickles and onions, and a drizzle of dijon mustard. 


    Wednesday, August 13, 2014

    Smokey Coffee Rubbed Steak


    Who doesn't love a good smokey, flavorful steak? I added fresh ground coffee to my rub and what was created was a beautiful crispy crust full of good smokey flavor. I seared the meat on the grill, then finished it in the oven.

    Smokey Coffee Rubbed Steak
    What you'll need:
    • 2-3 lbs beef tenderloin, or preferred roast cut
    • 2 heaping TBSP fresh ground coffee, medium or dark roast
    • 1.5 TBSP paprika
    • 1 TBSP dried oregano
    • 1 TBSP dried mustard
    • 1 TBSP garlic powder
    • 1 TBSP coconut sugar (optional)
    • 1/2 TBSP kosher salt
    • fresh crack black pepper, to taste

    What to do:

    1. Preheat oven to 500F. Combine all the spices in a bowl, breaking up any large chunks. Pat beef down to dry it a bit. Rub the spice mixture all over the meat, make sure to really work it in. You want a nice crust.
    2. Grill each side of the roast for 2-3 minutes. Remove from grill and place in a roasting dish or baking pan. Bake the roast at 500F for 3-4 minutes per pound I had a 3 lb roast, so I baked it for 12 minutes). Turn the oven off after the allotted time and leave the roast in the oven for another 2-4 minutes per pound (I left it in for another 10 minutes). 
    3. Remove the roast from the oven and allow it to cool for at least 5-10 minutes and redistribute its juices. The cooking times will vary depending on how well you like your meat cooked. The times I used produced a nice medium. 
    4. Slice and serve with a nice side of grilled veggies and a baked potato!


    See What Else I'm Cooking

    Powered by Blogger.